
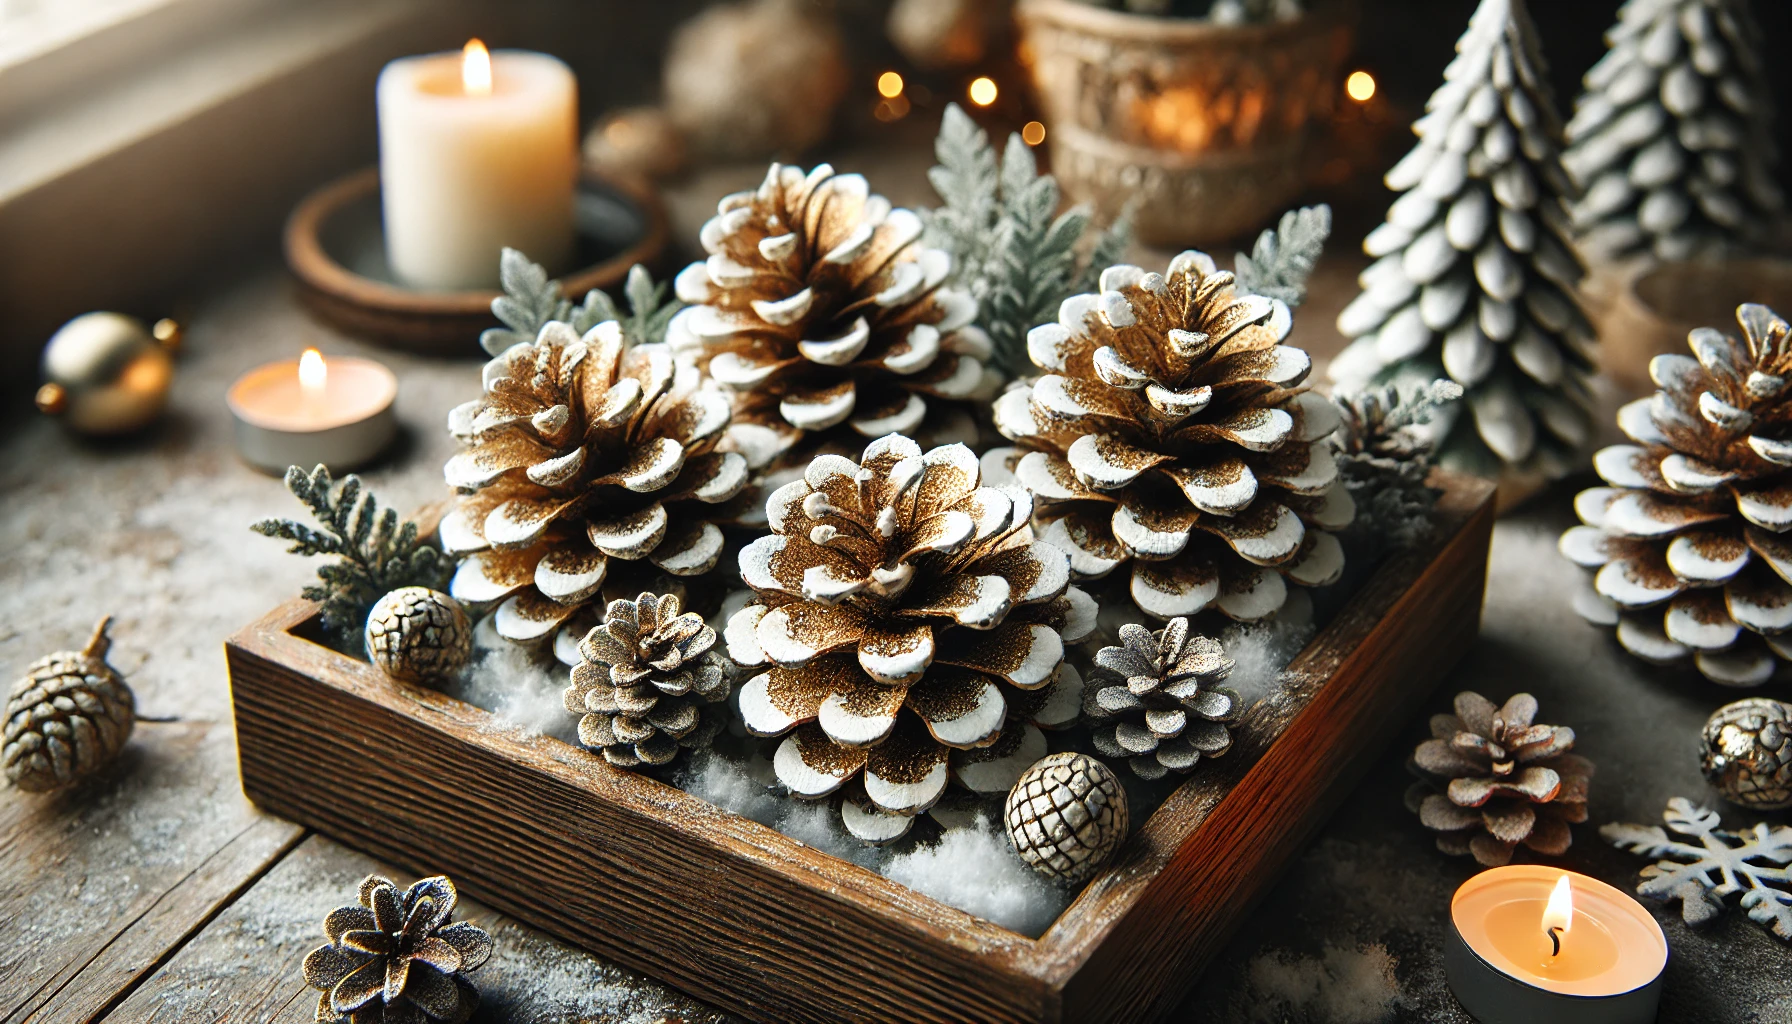

Looking to add a touch of rustic elegance to your holiday table? A pine cone centerpiece is the perfect solution. With its natural charm and cozy appeal, this simple DIY project brings festive warmth to any space. By using white or gold spray paint for a frosted look, faux snow, and a few candles, you can craft a stunning centerpiece in no time. Here’s how to make your own rustic pine cone centerpiece for the holidays.
Materials You’ll Need:
-
- Pine cones (collected or store-bought)
-
- White or gold spray paint (or both for variation)
-
- A wooden tray or shallow bowl
-
- Faux snow
-
- Pillar candles (white, red, or gold)
-
- Optional: Small ornaments, twine, or greenery like cedar sprigs
-
- Protective covering for your workspace
-
- Gloves (optional, to avoid paint on hands)
Step 1: Prepare Your Workspace and Pine Cones
Set up your workspace in a well-ventilated area, ideally outdoors or in a garage. Cover the area with a drop cloth or newspaper to protect it from paint.
Inspect the pine cones and remove any dirt or debris. If you collected them from outdoors, you can bake them in the oven at 200°F (93°C) for about 30 minutes to kill any bugs or moisture.
Step 2: Spray Paint the Pine Cones
Decide whether you want a frosty white effect, a warm golden glow, or a mix of both. Lightly spray paint the pine cones, holding the can about 6-8 inches away to ensure an even coat. Allow them to dry completely before moving to the next step.
-
- Tip: For a frosted look, focus on the tips of the pine cones.
-
- Bonus Idea: Add a second layer of glitter spray for extra sparkle.
Step 3: Arrange the Pine Cones in the Tray
Take your wooden tray or shallow bowl and begin arranging the painted pine cones. Place the largest pine cones in the center and build outward with smaller ones to create a balanced design. Mix white and gold pine cones for an elegant contrast.
Step 4: Add Candles and Faux Snow
Position your candles among the pine cones, ensuring they’re evenly spaced. Sprinkle faux snow around the pine cones and candles to give the arrangement a wintry feel.
-
- Safety Note: If you’re using real candles, make sure they’re secured and far enough from flammable materials like faux snow.
Step 5: Incorporate Additional Decorations
If desired, add small ornaments, sprigs of greenery, or twine bows for a personal touch. These accents can complement the rustic theme and tie the centerpiece into the rest of your holiday decor.
Step 6: Place and Enjoy
Display your rustic pine cone centerpiece on your dining table, coffee table, or mantel. The warm glow of the candles combined with the frosted pine cones will create a cozy and inviting holiday ambiance.
Creating a rustic pine cone centerpiece is an easy and rewarding DIY project that adds natural charm to your holiday decor. With just a few materials and a bit of creativity, you can craft a centerpiece that captures the spirit of the season. So gather your supplies, roll up your sleeves, and let your creativity shine!
Love this idea? Check out more of our holiday DIY tutorials for festive decor that makes your home merry and bright!